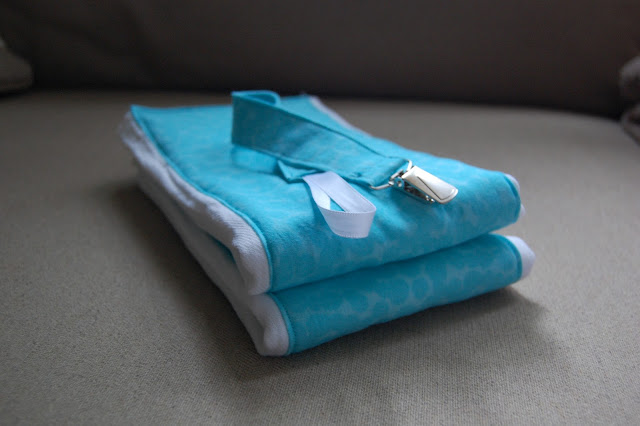
We are well into the season of life where pregnancy announcements are made, baby showers are hosted, and sweet little ones are born. It may just be more fun than wedding season! It also gives me plenty of opportunity to sew some gifts like these burp cloths, pacifier clips, tag blankets, and bibs. I tend not to sew clothing items as shower gifts because babies come in so many sizes. And sometimes the functional every day items like a pacifier clip or a burp cloth are just what a new mama needs.
A little corner to share mostly my favorite recipes and fun in the kitchen, but also some sewing projects, decorating ideas, and all around crafty goodness!
Tuesday, June 26, 2012
Wednesday, June 20, 2012
Paisley Pillowcase
A pillowcase dress actually made from a pillowcase : ) This color scheme is a bit of a departure for me but the wedgewood blue is so pretty and I just love the paisley print. I found a new pattern for pillowcase dresses that will be my new go to although I overcompensated a bit on length for this one. It will pretty through the fall, I suppose.
Monday, June 18, 2012
Romper
I was busy with my sewing machine last week so we have a few fun new outfits to model this week at the beach. Tonight, we started with this romper and I can't wait to make more. I found the pattern from a great little shop on Etsy (Pink Poodle Bows) and have another ruffled top and shorts pattern along with a dress to try from her.
The shorts are even. I think she was just standing at a funny angle. That, or it was all the running she did all night! She didn't stop moving.
Friday, June 15, 2012
Shirred Dress
I combined a few tutorials (here and here) for shirring and came up with this cute dress in pink gingham. And really, nothing says summer more than gingham! I decided to practice my french seams for the body of the dress.
And also added a folded band of white fabric to the bottom - first because I barely had enough pink fabric for my tall little toddler and second because I don't like hemming!
I think she liked it!
Tuesday, June 12, 2012
Chocolate Hazelnut Cheesecake
Cheesecake is one of my husband's all time favorite desserts. Chocolate and hazelnut just push it over the top. I knew I wanted to make one for his birthday dinner, but didn't find any recipes that met all the requirements. Instead this is a combination of three different recipes and one tutorial on how to peel hazelnuts. Who knew?
First up, the hazelnut shortbread cookie crust:
(from Pig Pigs Corner) - converted from metric just for you!
3/4 cup butter, softened
1/2 cup plus 2 TBS confectioner's sugar
1 egg
1 cup flour
1/2 cup cornstarch
3/4 cup hazelnuts, peeled (see this tutorial if yours have the skins on like mine - it's not as simple as you would think)
Cream butter and sugar. Add egg. (I added 1 tsp vanilla at this point also.) Add flour, corn starch, and hazelnuts. Mix just to combine. Press into the bottom of a lightly greased 9-inch spring form pan and bake at 325 F for 15 minutes. I used all of the dough and made a thick crust. Feel free to use less. This will only par bake the crust. Don't expect it to brown.
Next, the cheesecake:
(from Tyler's Ultimate)
16 oz. cream cheese, softened
3 eggs
1 cup sugar
1 pint sour cream
1 lemon zested (I omitted this because of the chocolate and hazelnut)
1 tsp vanilla extract
I added 1/2 tsp almond extract
Beat the cream cheese in a stand mixer with paddle attachment until soft and lump free. Add eggs one at a time, then slowly add sugar. Add sour cream and extracts.
Pour mixture over cooled crust and wrap bottom of spring form pan in foil. Then place in a large baking dish or roasting pan and pour boiling water about 1/3 of the way up the sides of the cheesecake. Water baths are a pain, but it made for a super creamy, moist, and crack free cheesecake.
Bake for 45 minutes at 325 F. Cheesecake should set, but may slightly jiggle. You just don't want a big "wave". I usually turn off the oven and let cheesecake sit for another 30 minutes with the door closed, then cool completely on the counter. Chill for several hours or overnight before moving on.
Finally, the nutella ganache:
Place 3/4 cup nutella in a heat safe bowl. Warm 1/2 cup heavy cream in a small sauce pan until just shy of boiling. Pour cream over nutella and slowly stir to combine. Add 1/2 teaspoon sea salt. Pour over cooled cheesecake. I had more peeled hazelnuts (about 1/2 cup) leftover, so I toasted them and finely chopped them in the food processor, then sprinkled over the ganache. Return to fridge to set up.
A little hazelnut liquor (Frangelico) in the cheesecake or the ganache would have been nice, too!
Thursday, June 7, 2012
Thread and Bobbin Storage
I found this blog post for thread and bobbin organization at The Creative Homemaker via Pinterest. The husband built the shelf for me, I painted it and added the nails for bobbins, and then he hung it for me last weekend. Although my favorite part is the tip about using plastic tubing to wrap around those loose bobbin threads! I found 5/8 inch (outer diameter) tubing at Lowe's for about $0.60 per foot. I only used a few inches so far.
About 90% of this thread came with Grandma's sewing stash with her machine. I think she liked blue and green, don't you?
About 90% of this thread came with Grandma's sewing stash with her machine. I think she liked blue and green, don't you?
Subscribe to:
Comments (Atom)


